Automated Continuity Test System
Overview
In this article we discuss using the Qt5 framework to create a test automation application to assist with testing of devices where hands free recording may be useful.
Table of Contents
Background
This system was created to fulfill a need to record continuity results while working with high density, quality critical (aerospace) application that require 100% test with retained records. The framework allows the task to utilize automation with a switch matrix and was architected in such a manner to allow switching out of device drivers with relative ease.
Often in high density applications the use of a microscope or magnifier is important. In these applications your focus remains within the view of the microscope objective and switching back and forth between a computer screen and a microscope can lead to fatigue and eye strain. Therefore this designed has this application in mind and focuses to solve these problems.
In summary this sytem provides an efficient and easy to use method to cycle through test points hands free while simultaneously recording data for export.
Equipment Used
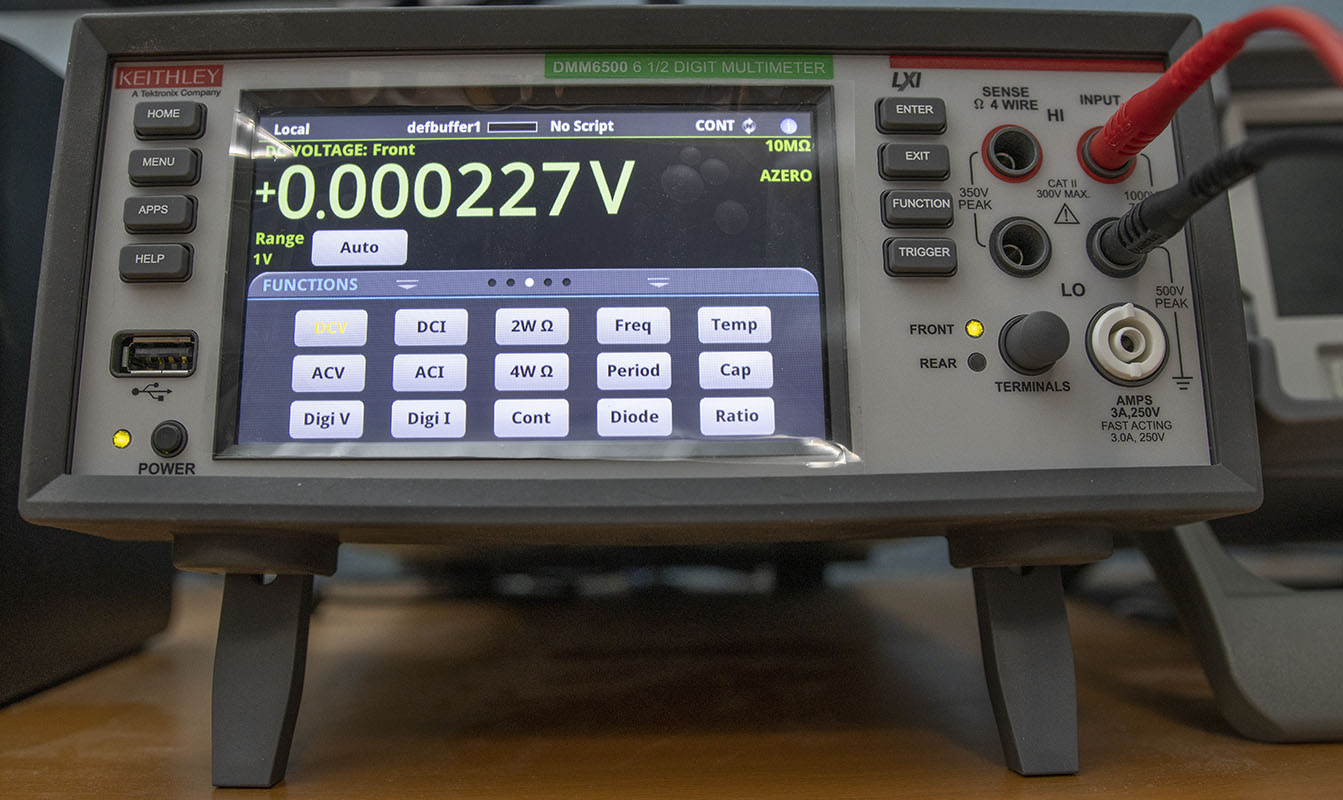
This system as designed uses the Keithly DMM6500, and an external human interface device to allow cycling through the test points. No further hardware is required, and the system was designed in such a manner to allow easy integration with other devices and protocols including GPIB, USB, LAN, and even serial ports.
Software
This system utilizes the Qt5 framework and was written in Python 3. It incorporates multi-threading to ensure the GUI is updated and does not lag even with high speed update rates. Care was taken to make the GUI as simple and as intuitive as possible. There is no limitation to the number of connection test points supported.
The Qt framework is my favorite, and is a highly mature graphical user interface framework that is used extensively by a large group of people both professionally and within the maker community. There exists both commercial and open source licenses that allow you to use the framework for free so long as you follow the license restrictions.
The documentation for Qt may appear lacking when it comes to Python but the C++ documentation for the framework is very well documented and extensive. Once you understand the basics it is quite easy to look at the C++ documentation and immediately apply it to your Python project.
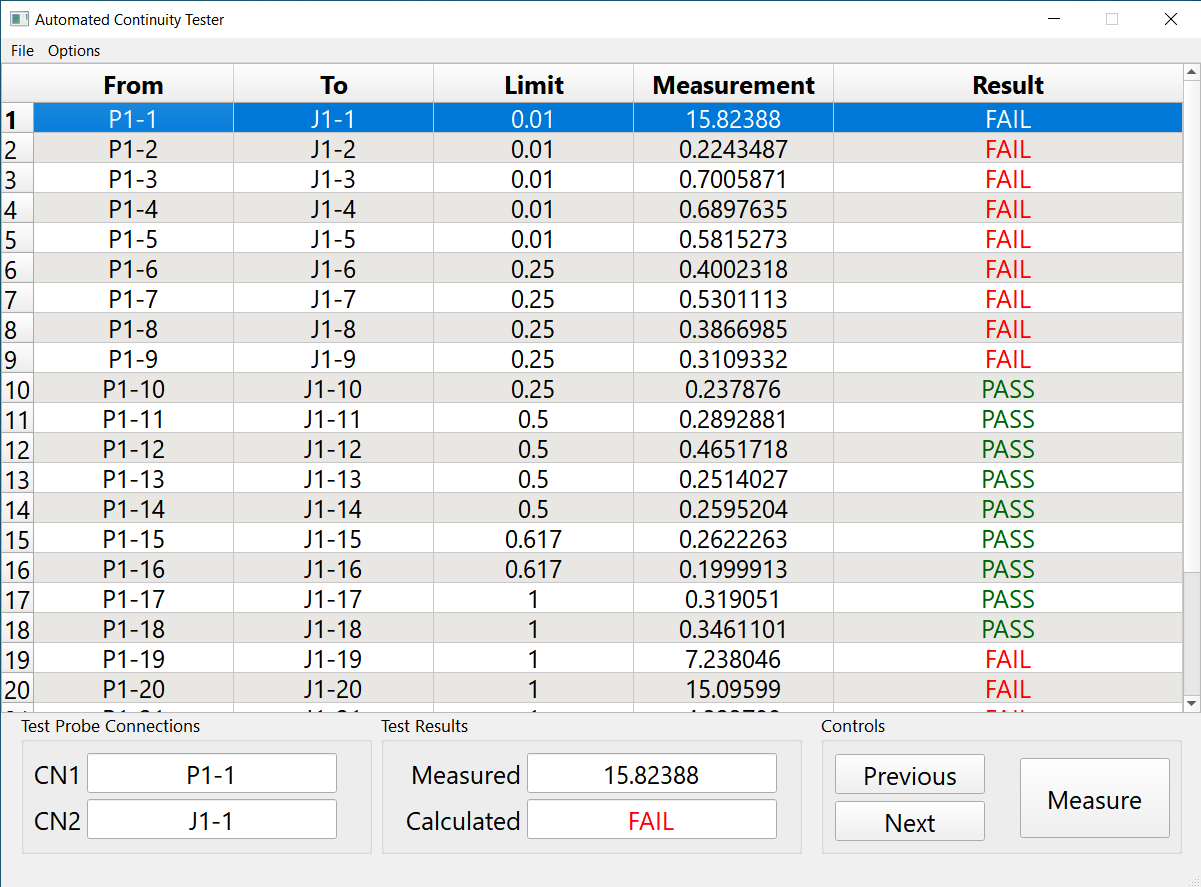
The GUI was organized in a minimalistic approach. The main window consists of a QTableWidget which displays all of the test data, and then a more focused section towards the bottom with controls on the right.
If you notice the arrangement is in a rectangular fashion which works well with human eyes. We could have just as easily placed the bottom content on the side of the window, however, this would be harsh on the eyes and lead to less productivity since you would be constantly scanning up and down to get the data you needed to complete your task.
The bottom controls draw your focus by being larger and grouped in elements. The first box is the test probe connections that show the operator where to connect the test probe. Once a measurement is taken the measured and calculated results will be displayed and clearly indicate whether a pass or fail has been detected based upon the input limits.
The final controls allow manual operation of the testing to actuate the currently selected connection, however, these are added simply to balance the design and aid in manual operation. In a typical application the application would be used with an external human interface device.
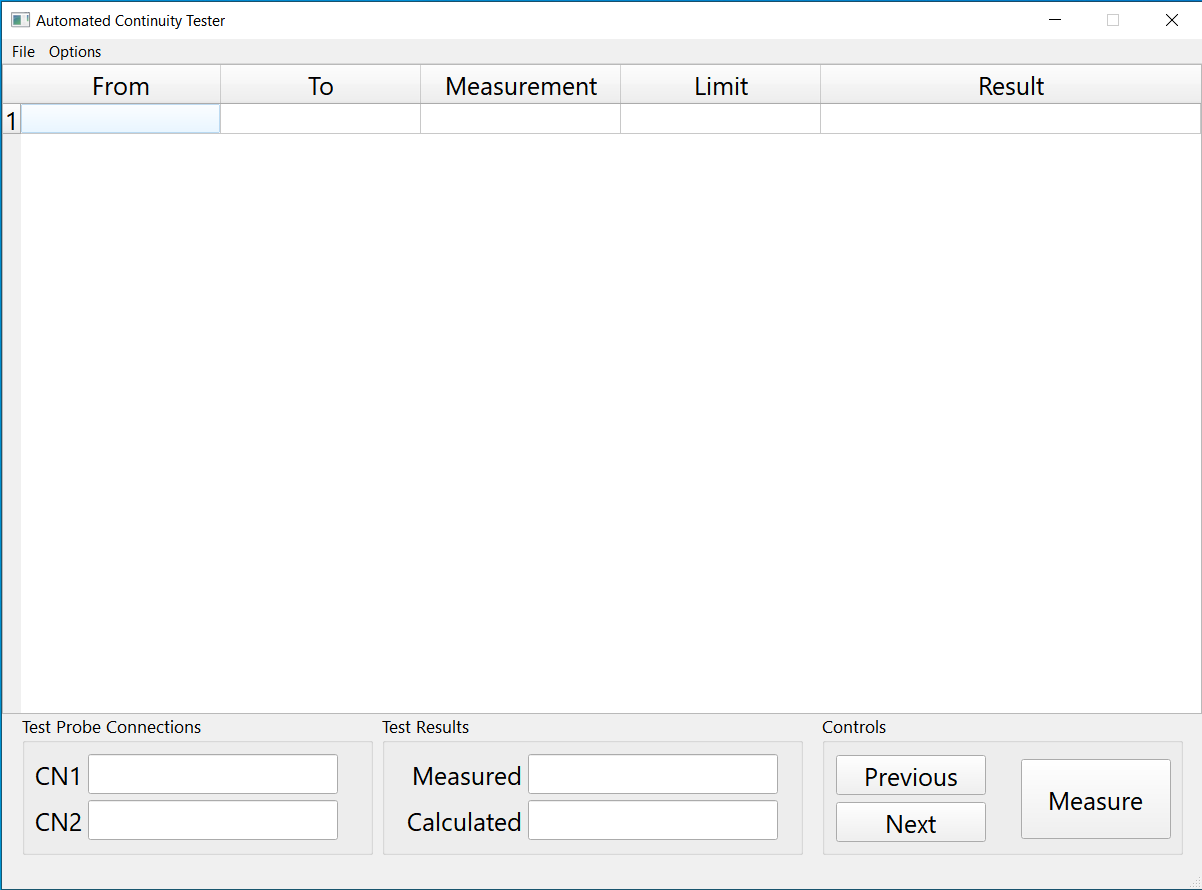
Upon application startup the fields will be blank. The basic concept is you will already have a from-to list prepared. This list can then be imported in CSV format to setup the application for testing.
In the settings one can choose the proper instrument address for startup and adjust various settings.

Once the test parameters have been imported testing can begin. There are two methods to actuate the test, one is the buttons on the GUI, and the other is with a custom human interface device that allows hands free operation. The system was designed and tested with this HMI for use while testing under a microscope but can also be operated with hotkeys.
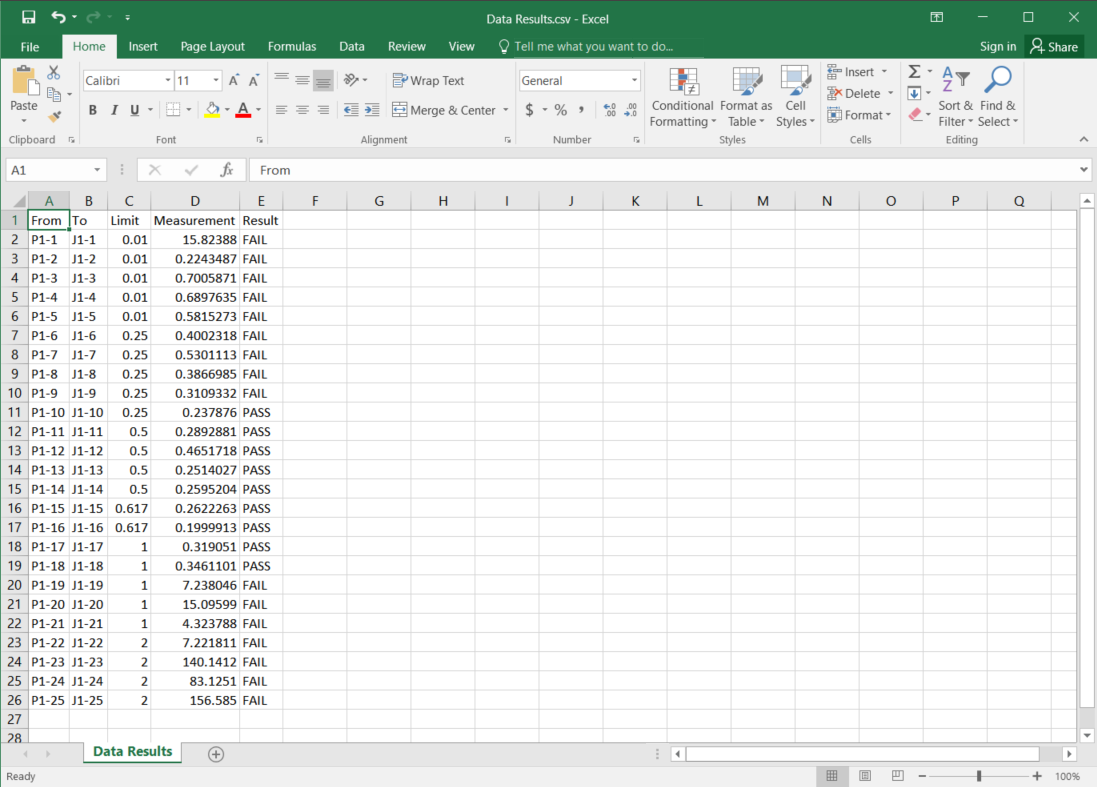
When the test is done the operator will want to export the data from the application. This can be done from the file menu by selecting file->save as. The default output option is a CSV (comma separated value) file, however, report generation to PDF is a coming feature utilizing a reporting module.
The data export is handled using a dictionary structure which allows easy reconfiguration. Each and every piece of data has one of these keys so that future versions can allow remapping and placement of data based on these tags. Additionally this method allows the operator to use this same program to perform a multitude of additional measurements such as voltage, current, resistance, capacitance, inductance, frequency, temperature and so forth.
QTableWidget Modification Example
Some things can be rather unintuitive when developing with Qt and simple tasks can become relatively complex if you are not familiar with their operation. For this example we will discuss how to align the elements within the QTableWidget.
In a QTableWidget all of the elements are QTableWidgetItem() objects. When we want to edit a table element we must first create a QTableWidgetItem instance, and then use the setItem method of the tableWidget object with that instance referenced to assign it.
It looks something like this:
def edit_table_item(self, index_row, index_column, input_string):
	element = QTableWidgetItem(input_string)
	self.tableWidget.setItem(index_row, index_column, element)
Note: This function assumes that the GUI is within a class (hence self, and that the input is a string.
Basic QTableWidget Editing Steps
- Create the QTableWidgetItem with the intended input
- Apply any properties to the element as desired, such as alignment.
- Use the tableWidget’s .setItem method with the index of the row and column you intend to replace it at.
If you want to add alignment to the cell for instance you can use the QTableWidget’s method .setTextAlignment. This method uses the Qt.SetVCenter, Qt.SetHCenter enums, however, we are going to do it a slightly different method since the argument only takes one value, not two.
To center the text both within the vertical and horizontal centers we simply OR these two values together as shown:
element.setTextAlignment((0x0080|0x0004))
This gives us the following code snippet:
def edit_table_item(self, index_row, index_column, input_string):
	element = QTableWidgetItem(input_string)
	element.setTextAlignment((0x0080|0x0004))
	self.tableWidget.setItem(index_row, index_column, element)
The elements are now centered!
Note: The index_row, and index_column variables are for the user to specify. Note that the first cell is similar to the index in a list whereby the element is actually element zero.