Overview
In this article we discuss making better breakout boards by considering the intended application, how to improve usability with silkscreening, standardized dimensions and empty space.
Table of Contents
Why build a breakout board?
In short, I like to test components and circuit “blocks” before spinning a large expensive and long lead time board.
Building these boards is often very quick, and can be used to validate blocks of your system prior to spinning complete boards which take time to manufacture, assemble, and get tested. A breakout board can typically be quickly hand-assembled in most cases, and with local PCB shops offering quick turns at very low cost for such small boards it is a good way to have access to hardware for testing, debug, and validation days or weeks in advance.
Project requirements
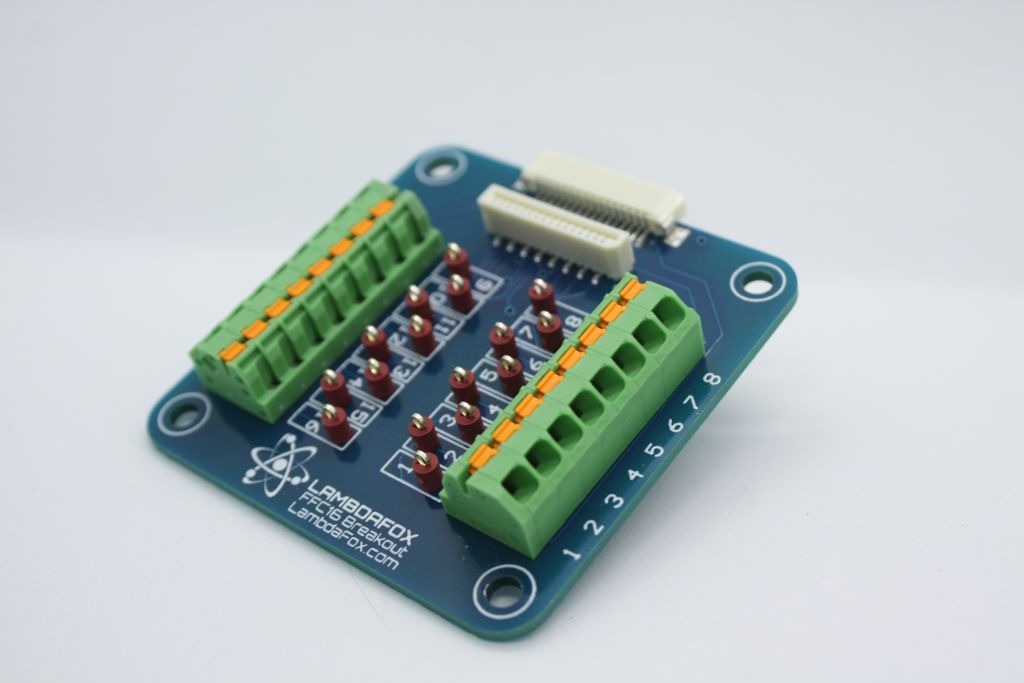
For this project I needed to connect a flat-flex connector to a test system to validate a prototype system which did not have test points or exposed headers. For this design I opted to do both hook test points and spring terminals for connecting cables with ferrules.
Design
This breakout board follows my standard design philosophy. Make it simple, reliable, standardized, and well documented.
Simple
The board is simple in that it is not cluttered and makes good use of available empty space without being bulky.. The offset test hooks allow all test points to be used without interfering with the probes. The silkscreen numbering faces the opening of the connectors for when the operator will be wiring the board. The terminal blocks used are a single connected string to aid in assembly. Finally, the main flat flex connectors have sufficient room to easily plug and unplug the connector, and the edge mount connector is slightly offset from the edge to facilitate multiple removal cycles.
Reliable
I implemented two different connectors to allow for a semi-permanent test fixturing. Should this design need to remain connected beyond a temporary basis I do not want clips to pop off and thus added terminals too. The spring release terminal blocks solve this and add a aesthetic balance.
Standardized
Standardize your designs! If everything you make follows the same hole patterns you can reuse fixtures, assembly jigs, or have board templates ready for the next project. This means you can save money, but by that same token know when to follow the rules and when to break them as not everything needs to be reusable.
Standardize your designs! If everything you make follows the same hole patterns you can reuse fixtures, assembly jigs, or have board templates ready for the next project. This means you can save money, but by that same token know when to follow the rules and when to break them as not everything needs to be reusable.
This board follows one of my standard board sizes with a hole spacing of 45x45mm featuring M3 holes. The M3 holes allow the board to be permanently mounted with screws, or my favorite way of mounting is using plastic standoffs that snap into the M3 size holes.
Documented
Consider how your boards will be used, and try to make life easy with appropriate labelling and silkscreens. If you have the space available use it to your advantage by including relevent data on the board. Things like pinout numbers for external connectors, hole size and spacing, or polarity and voltage of connectors make a world of difference.
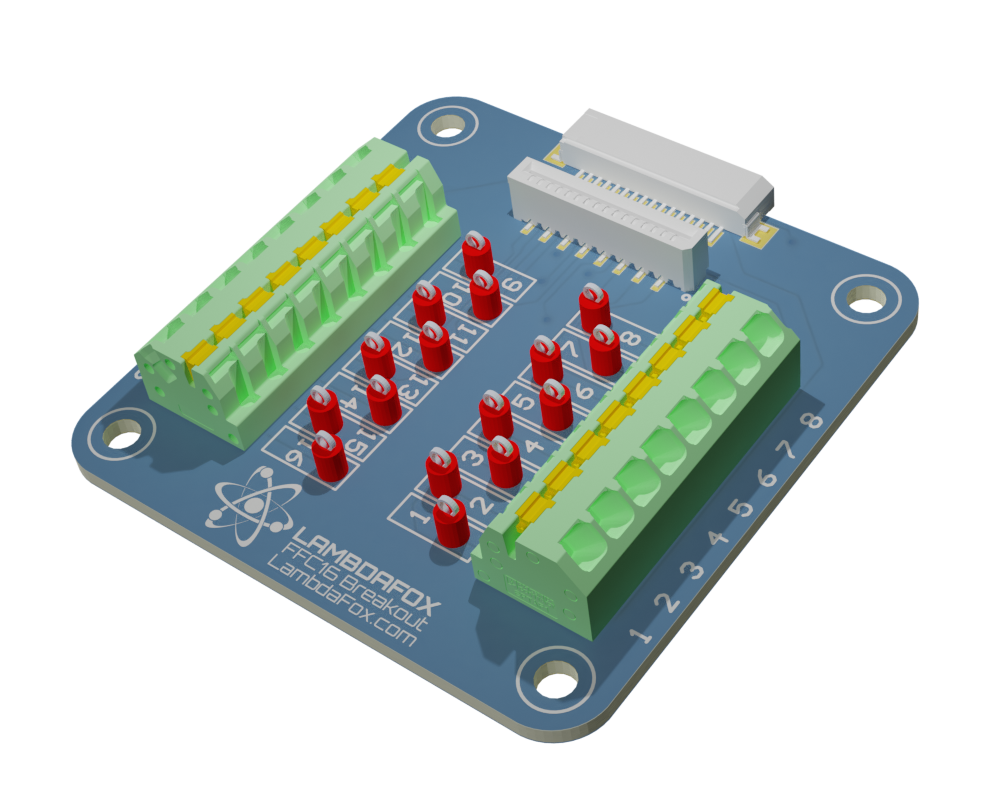
I particularly like to add a silkscreen box for a serial number, model number with revision, hole size and spacing dimensions to the board. Notice that I added bounding boxes for the test points so that it is clearly understood which goes where. Rotating them could have given more space to differentiate but would reduce the intuitive nature of the design and require potential users to turn their head to verify connections.
Not only will documentation make your end user’s life easy but when you need to test, assemble, repair, or calibrate your devices you won’t have to go digging through pages of documentation to power it up.
Final Result